Amazon DocumentDB Connection Overview
Amazon DocumentDB is compatible with MongoDB 3.6 drivers and tools.
By default, Amazon DocumentDB in not available for direct connections outside Amazon VPC.
However, you can use SSH tunneling (also known as “port forwarding”) to access your Amazon DocumentDB from NoSQL Manager for MongoDB.
To create an SSH tunnel, you need an Amazon EC2 instance running in the same Amazon VPC as your Amazon DocumentDB cluster. You can either use an existing Amazon EC2 instance in same the Amazon VPC as your cluster or create a new one.
NoSQL Manager for MongoDB Pro creates own SSH tunnels and does not require a third-party SSH client like PuTTY.
The instruction below helps you to establish connection to your Amazon DocumentDB using SSH tunneling feature.
1. Register new MongoDB connection.
Click Server|New MongoDB Connection… in the Main menu to register an AWS DocumentDB cluster in NoSQL Manager for MongoDB.
2. Set up SSH Options.
Click SSH Options in the left panel and switch on Use SSH Tunneling option on the right side.
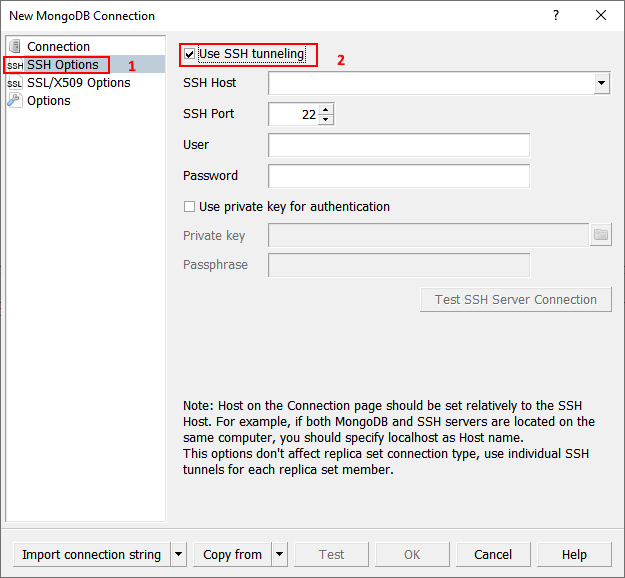
Specify public DNS of the Amazon EC2 instance running in the same Amazon VPC as your Amazon DocumentDB cluster in SSH Host field.
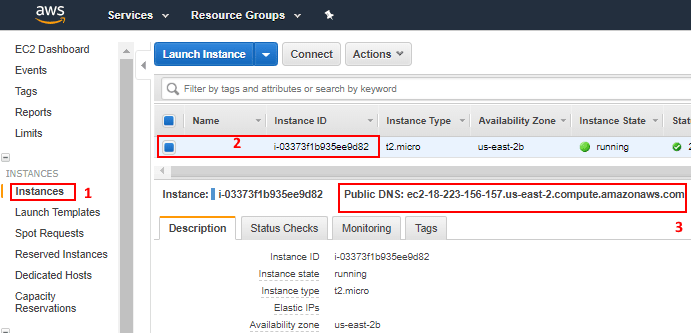
You can get the public DNS using the Amazon EC2 console.
Log in to Amazon EC2 console, click Instances in the left panel, choose your instance on the right side and copy Public DNS address.
Type the default user name ec2-user in User field.
Next switch Use private key for authentication option on and specify in Primary key field fully-qualified path to the location on your computer of the .pem file for the key pair that you specified when you launched the instance. Read more about Amazon EC2 keys.
You can test your SSH settings with Test SSH Server Connection button.
3. Set MongoDB Connection.
Click Connection in the left panel of New MongoDB Connection dialog.
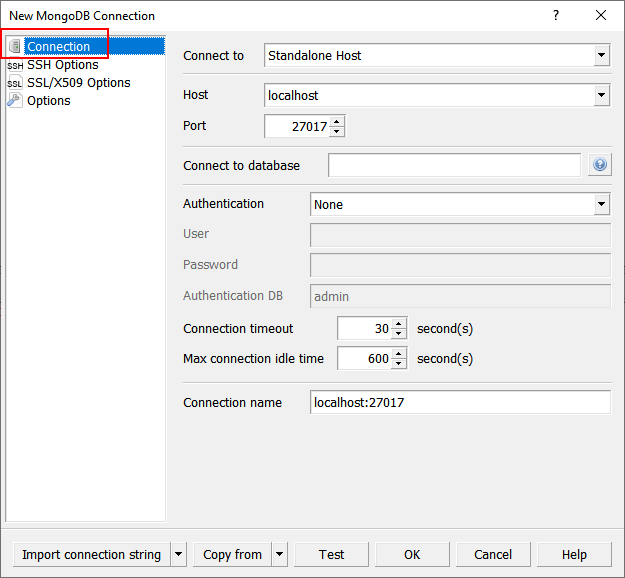
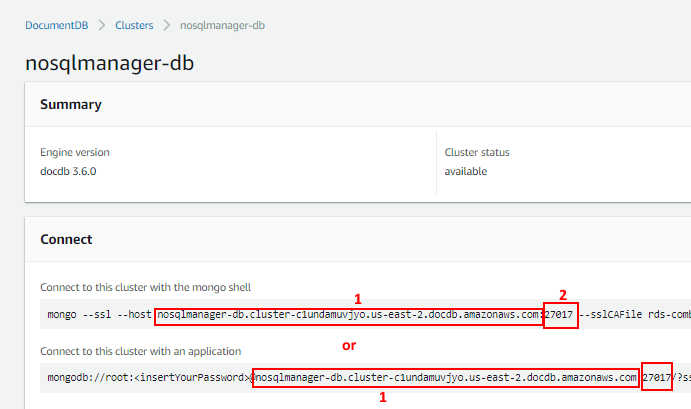
Specify cluster endpoint of your Amazon DocumentDB cluster in Host field.
You can get the cluster endpoint using the AWS DocumentDB Console.
Log in to AWS DocumentDB Console and click your cluster name on the right side.
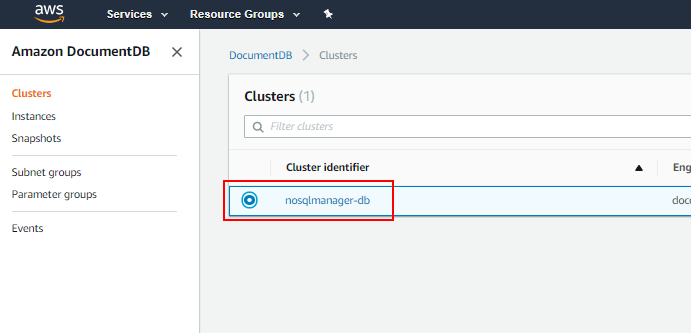
Copy the address from connection string and paste it to Host field, also type port number in Port field.
Next select SCRAM-SHA1-1 in Authentication field and specify your MongoDB user and password in User and Password fields.
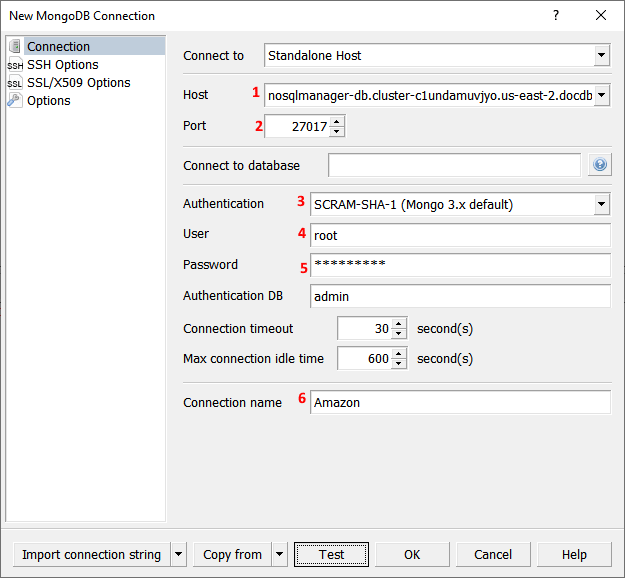
In Connection name you can specify an alias for this connection.
4. Set up SSL Options.
By default, a newly created Amazon DocumentDB cluster only accepts secure connections using Transport Layer Security (TLS). Skip this article if TLS is disabled for your cluster.
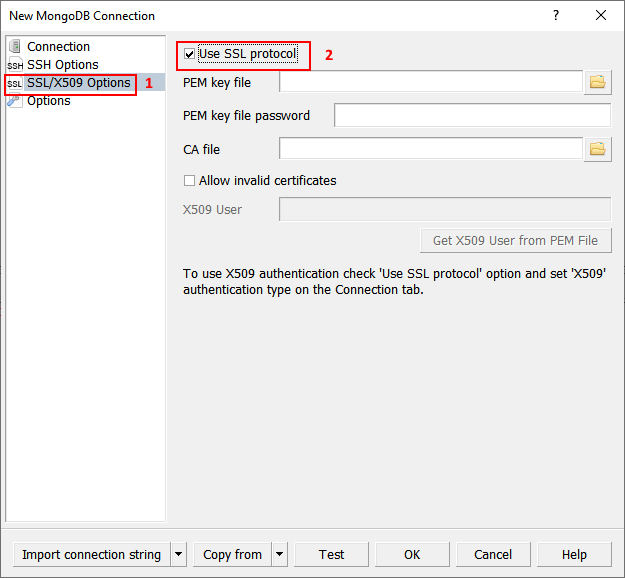
Click SSL/X509 Options in the left panel of New MongoDB Connection dialog and switch on Use SSL Protocol option on the right side.
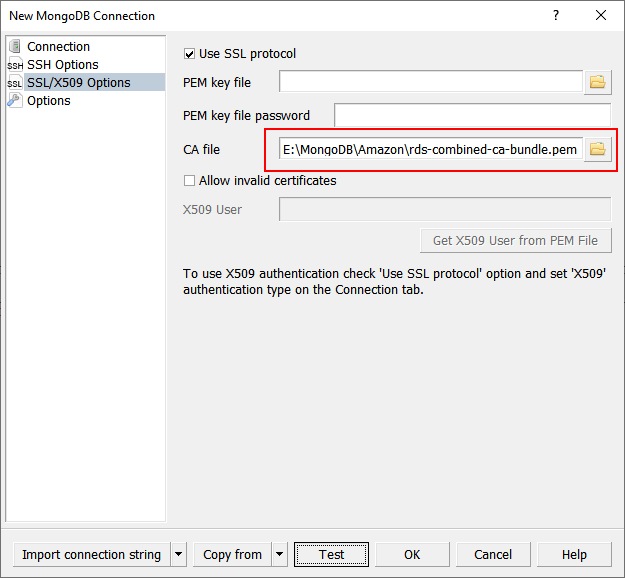
Next you need to download the public key for Amazon DocumentDB. You can download the public key at the following URL:
https://s3.amazonaws.com/rds-downloads/rds-combined-ca-bundle.pem
Save this .pem file to a disk and specify in CA File field fully-qualified path to this file on your computer.
5. Save Connection.
Finally click OK button to save your connection for permanent use in NoSQL Manager for MongoDB.
